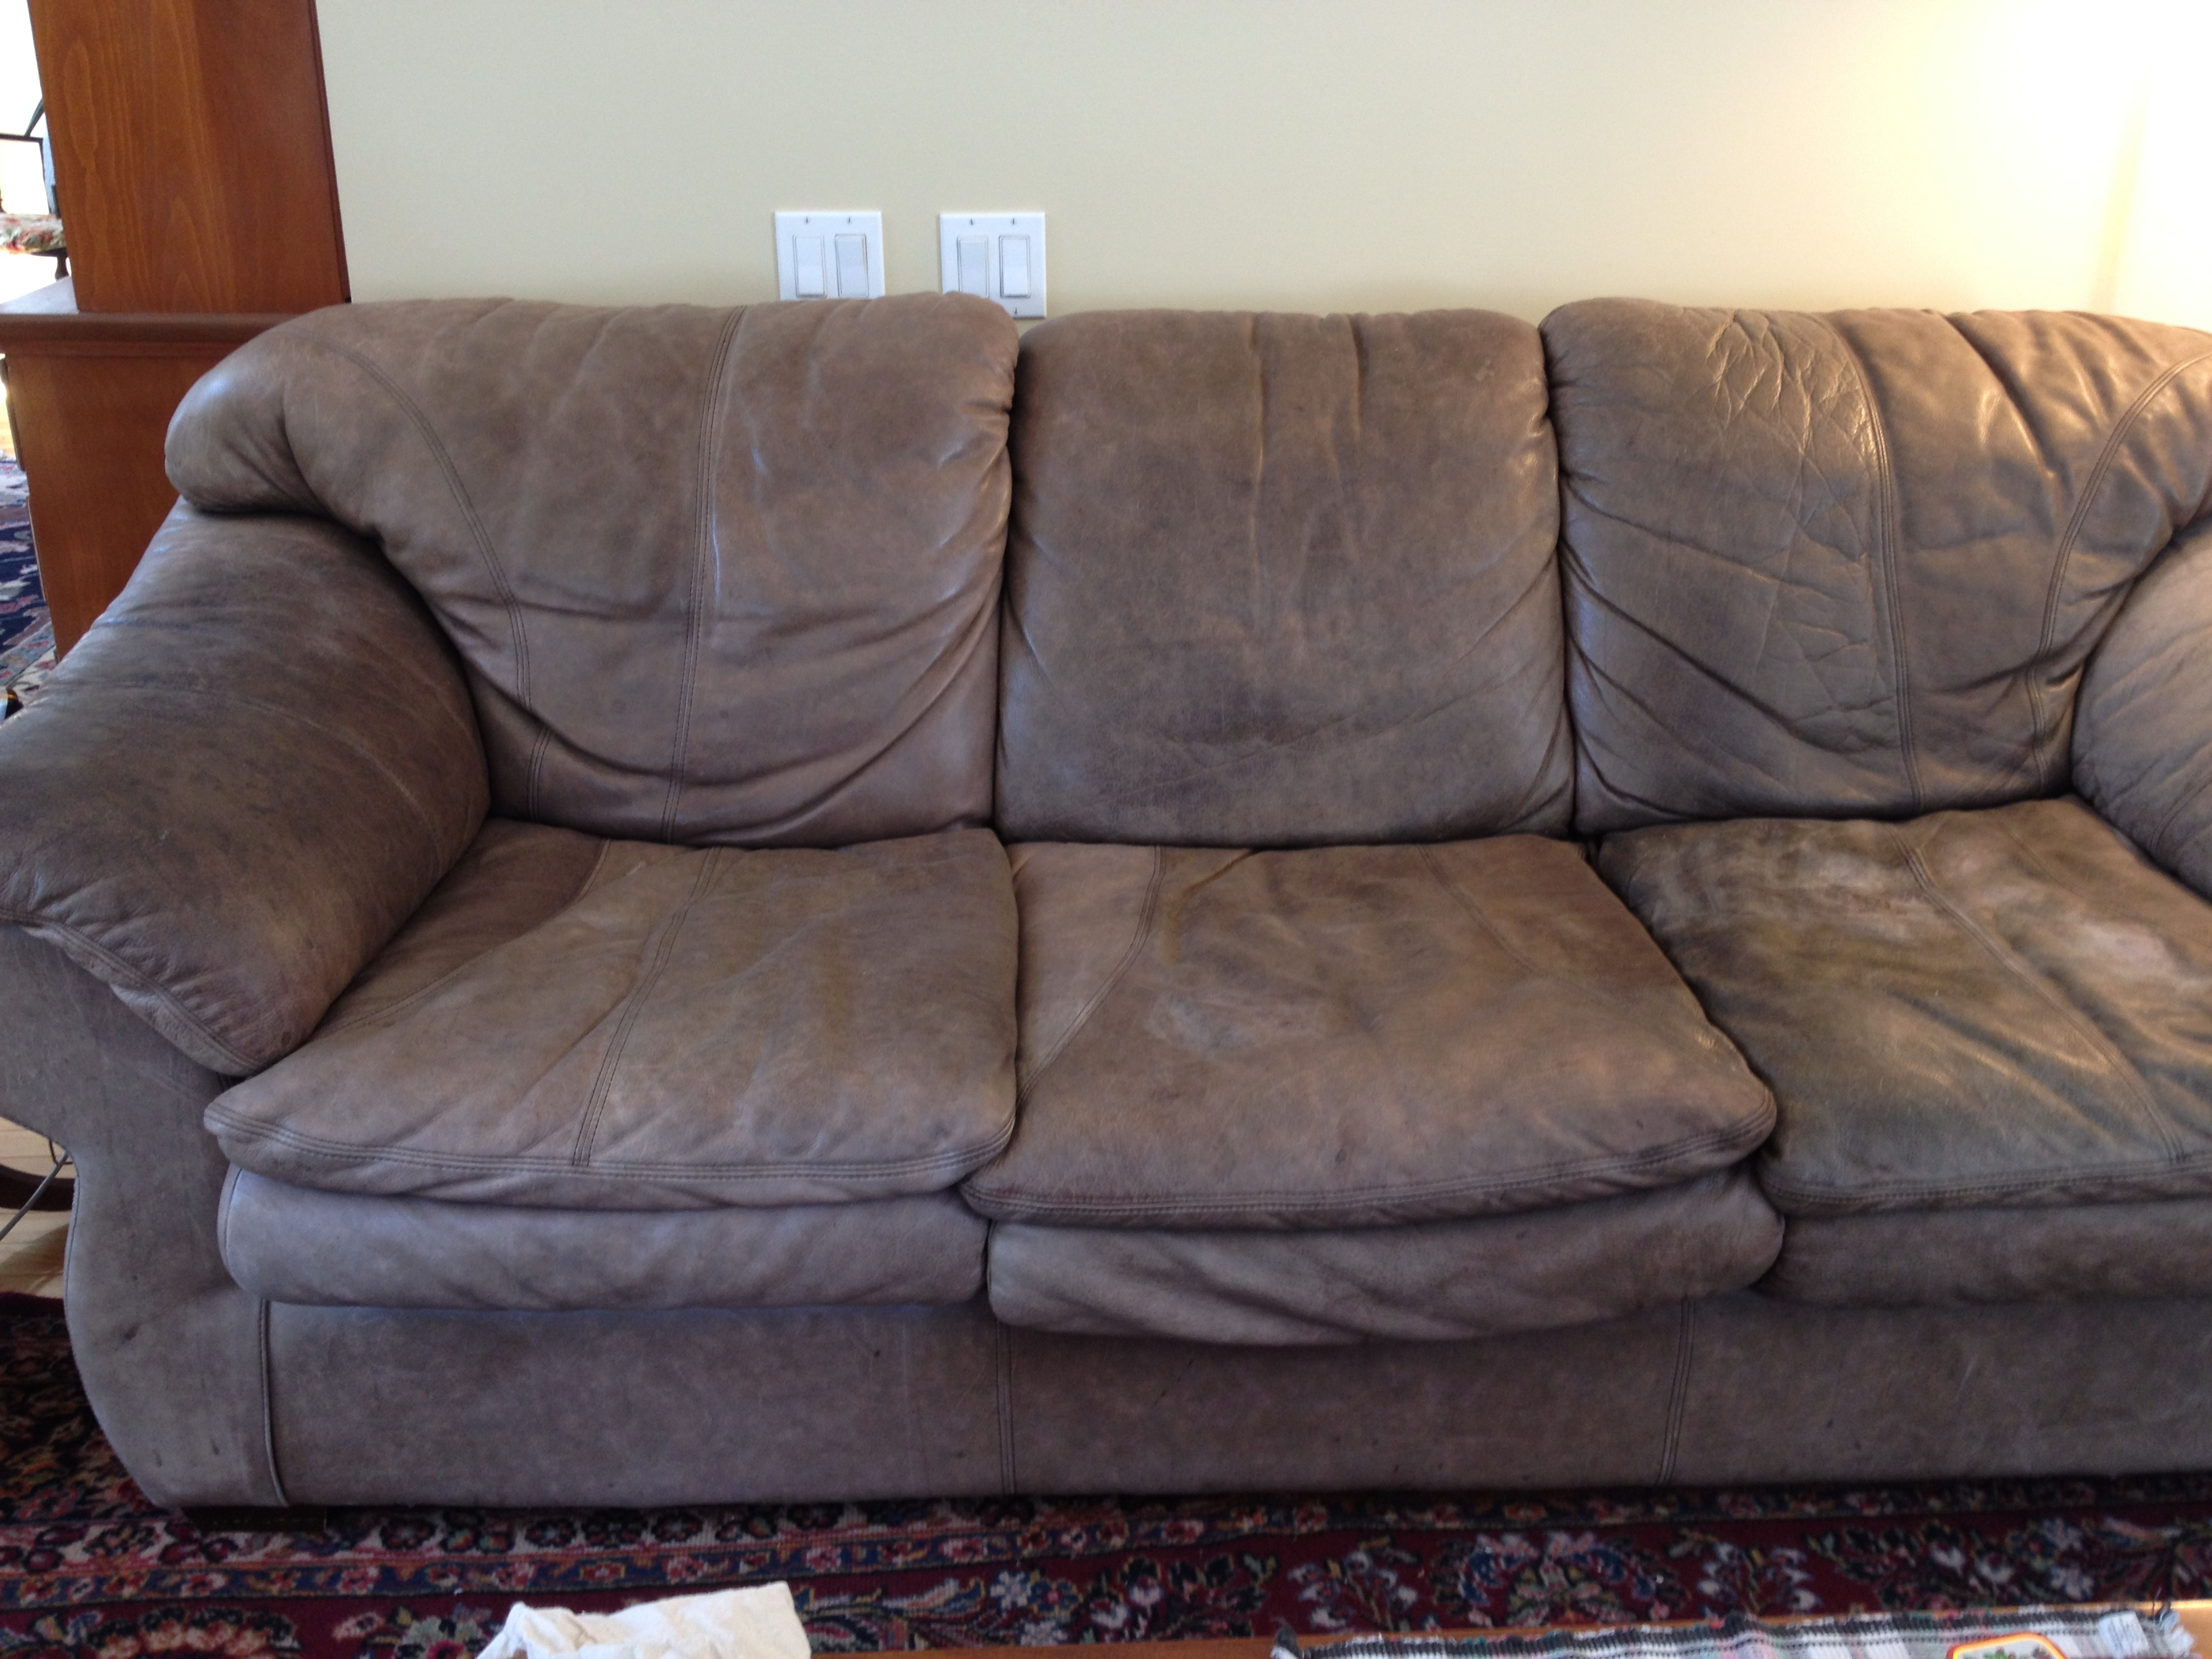
Before too distressing in this state!
This is a long story (over a decade) about what I’ve done to refurbish a well made leather sofa, loveseat & chair. My latest effort was the most dramatic improvement and cost me about $10 in materials. Hopefully my trial and error will save you some trouble and inspire you! My process photos are minimal because I was moving quickly to complete this transformation.
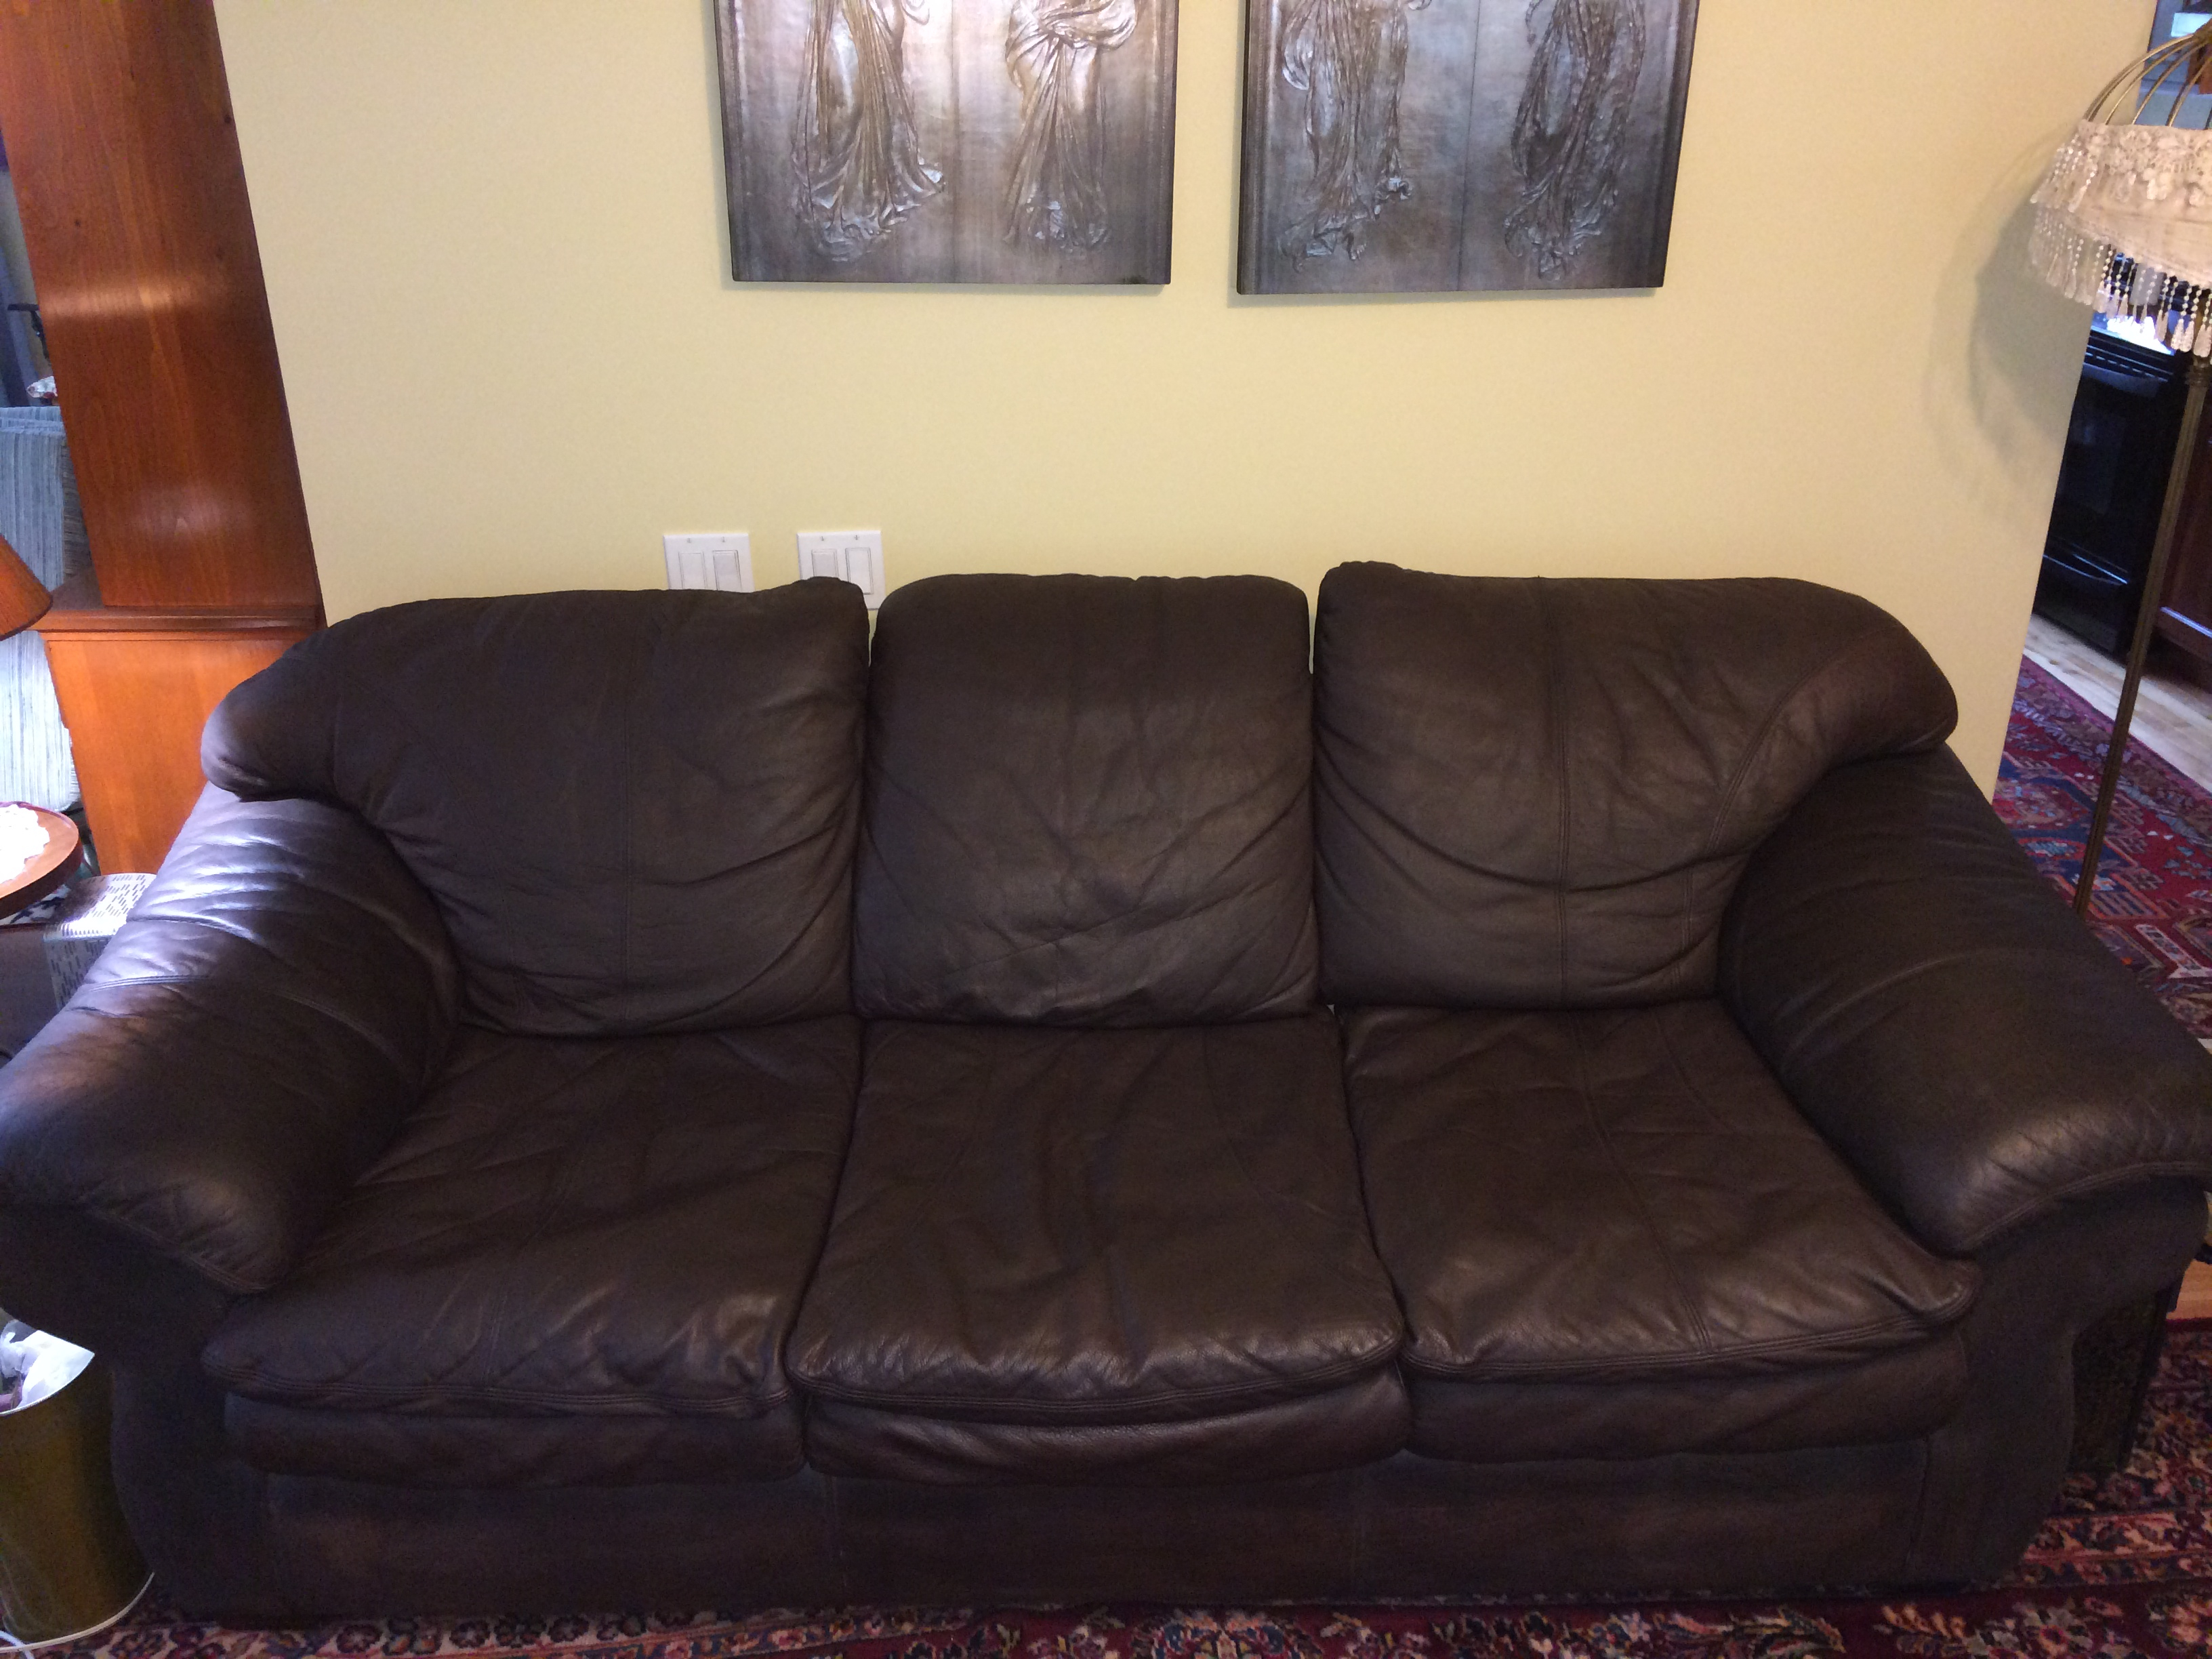
After, photo is a little darker than reality
Over a decade ago I purchased from a thrift store an abused oversized leather sofa, loveseat and chair. At that time I realized it was a gamble because the leather was filthy but beautifully built, I naively believed that I could clean it up to be awesomely distressed. This furniture was made with very high quality Brazilian leather (NOT BONDED LEATHER), lovely thick hides well sewn together. To clean the leather and distress it, I unzip all the cushions and washed them in a laundromat /commercial washing machine, yep I put the leather cushion covers in the soapy washing machine, the leather was too thick to wring out in the washing machine alone so I put them into the laundromat’s big wringer, then into my home tumble dryer. I didn’t dry them completely as I knew I had to stretch the covers back over the cushions. I scrubbed the body of the furniture, I don’t remember what I used for that. Honestly I thought I get a least one piece of furniture out of this project, I wasn’t sure which pieces would survive my determination to clean them. All the pieces survived. My rationale was it’s heavy leather, like a baseball glove and can take a licking. As time ticked on all my attempts to clean our numerous abuses, made my distressed leather look TOO DISTRESSING!
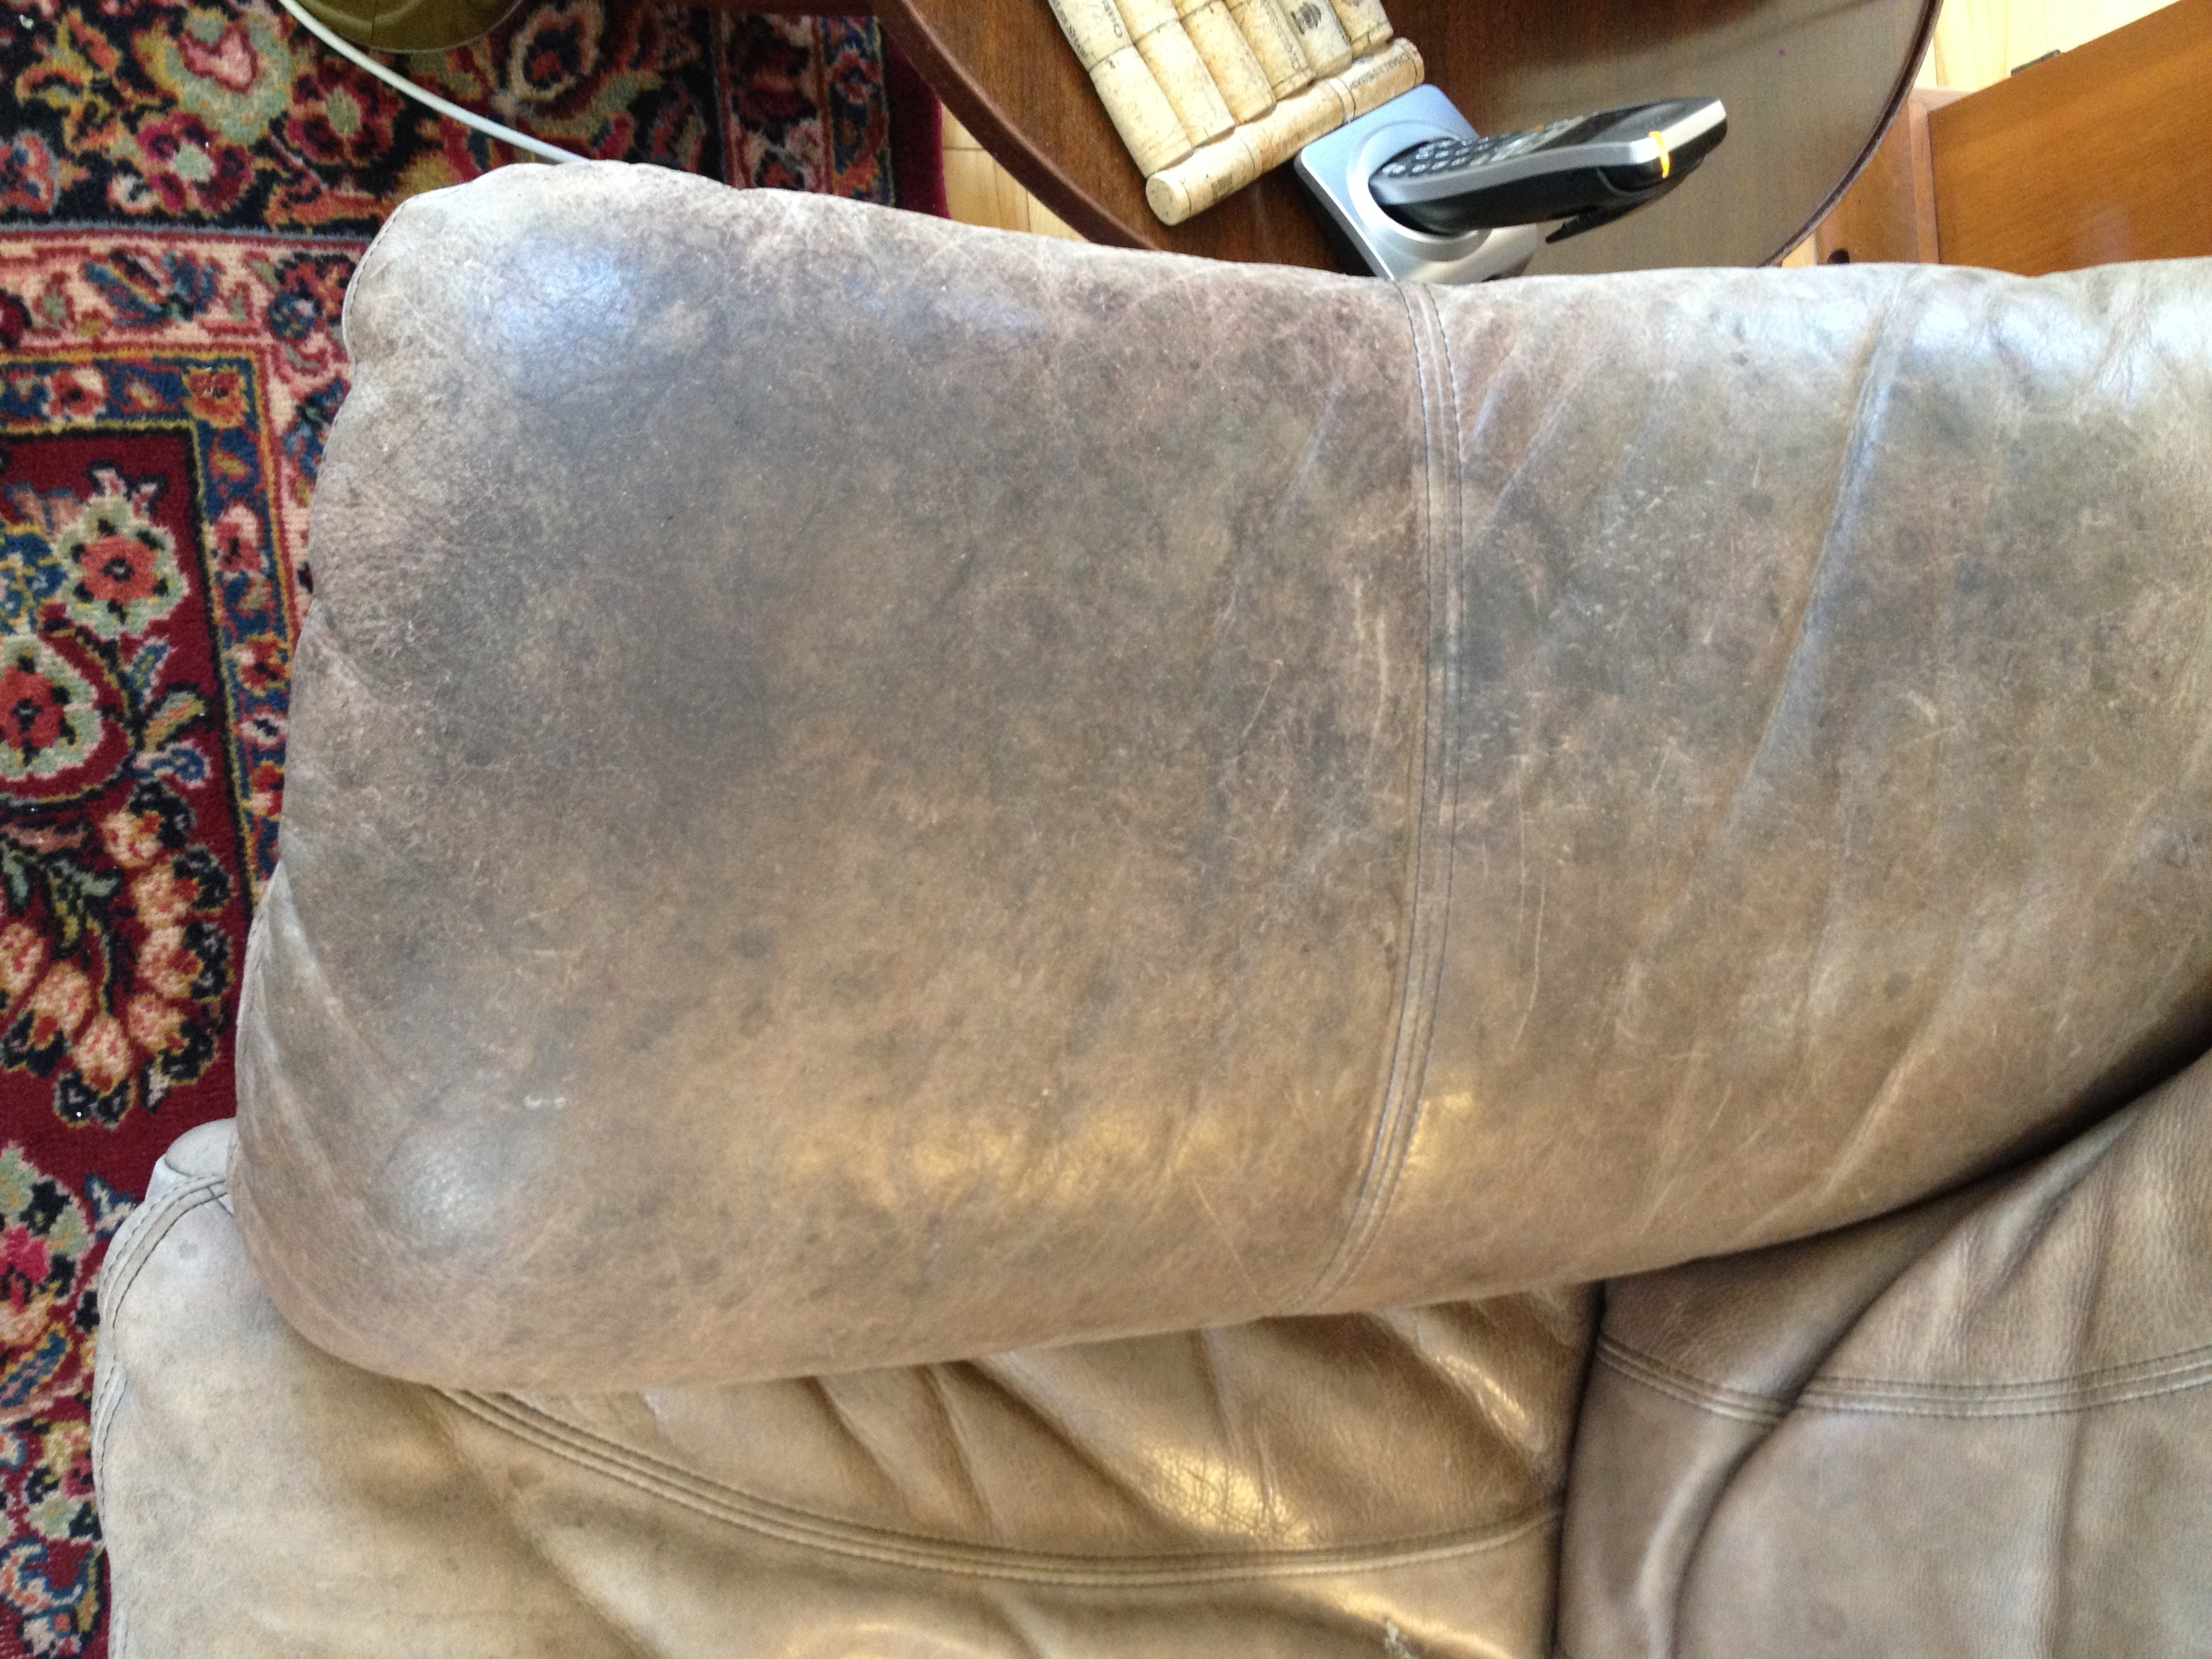
Detail of arm before, stains & scratches galore!
Fast forward 12+ years, to this past winter when I began to look for new furniture but changed my mind because I still have a cat. I just won’t invest in new furniture until I’m pet free. (Kitty is getting very old so I just need to get a few more years out of this set). I researched ways to refurb the sofas with dye. All the products available seemed pricier than I wanted. Somewhere on the web I read that a leather smith used ordinary wood stain to color his/her leather projects and also on the same page many people commented that wood stain wasn’t a good choice for reasons I ignored:). I also read someone used hair dye! I found some stain in my workroom and tried it on a small spot and thought OK wood stain is inexpensive easy to purchase dye and might work!
At the nearest home improvement center I purchased 1 quart of Rust-Oleum Ultimate Dark Walnut Oil Wood Stain, a color that was slightly darker than the original brown. Then I tried to wash the leather with a mix of soap and water but when it made no difference to the surfaces I decided to go big and fast with an electric rotary sander. I made a huge mess of leather dust and quickly realized I was at the point of no return. It took me 2 -3 hours to sand all 3 giant pieces of furniture & cushions, then a quick vacuum and wipe down to prepare for the staining.
The sofas were in my great room & it was early April in New England. I worked with fans on windows and doors open. That night and for the next several days we shut the heat off, left fans on and windows opened. It took about 4 days for the leather and my house to stop smelling like stain. Doing this inside the house was NOT A GOOD IDEA, we managed by closing off the rooms and sleeping in our bedroom with the windows open, but this is not a project for the living space.
Approximately $10 of materials: 1 Qaurt of stain $8.50, (rest of the materials I have on hand) 120 grit & 220 grit sandpaper & electric sander, foam brushes, rags, gloves, water, vacuum cleaner, lemon oil or other oil, vinegar.
Step 1: Move all the furniture to outdoors or seriously tarp/drape & ventilate your workroom (I didn’t and that was a big mistake)
Step 2: Remove scratches and original finish by sanding working from medium grit sandpaper to the fine sandpaper. I was aiming to even out cat scratches and also anywhere the original finish was still obvious (like the backs)

Loveseat all sanded and ready to stain.
Step 3: Clean up the dust with a vacuum , use the water to dampen rags and wipe down remaining dust.
Step 4: Put on the gloves and thoroughly mix the stain, the pigment will settle so be sure to stir often (I use a bamboo BBQ skewer).
Step 5: Apply the stain with foam brush and rub it in with rags, keep working the stain into the leather just l like staining a piece of wood, go with the grain, get all the nooks and crannies. Rubbing in the stain is essential to get even coverage, keep going until all the surfaces are evenly stained. Some areas will take more than others. This step took me about 5 – 6 hours. The leather dried to the touch in about 2 hours.
Step 6: Next day I was left with 3 huge pieces of renewed but dull looking furniture and plenty of stink. I tried numerous things to bring back a little luster but ultimately I used a combination of lemon oil and vinegar. 1 part lemon oil & 2 parts of vinegar. On the web I found a recipe for leather cleaner that was olive oil and vinegar, but I had about 3 ounces of furniture grade lemon oil so I just added the vinegar to it, shook it like salad dressing then put it onto a clean cloth and it was perfect. I rubbed the oil/vinegar mix into the leather and it polished it perfectly. (I had tried butchers wax first and all it did was stink more and turn white on the surface. The oil & vinegar cleaned up the white places where I had tested with the butchers wax).
After a few more days of ventilating we began to really enjoy the new look. Looking back on this project I wish I had done it all in the garage and also wish I had done this years ago because the transformation is remarkable. For about a week I kept rubbing the surfaces to see if the stain would come off at first I would get a little stain off the surface but soon it dried completely and now it’s perfect. As I write this I’m sitting on it in a white shift with no worries. I will continue to clean the leather with the oil and vinegar mix. It smells good and makes the leather look great. Though I do wish to replace these enormous pieces of furniture because I don’t love their looks or comfort I’m very pleased with my efforts to improve their appearance for now. When the old kitty is gone these pieces will quickly resell to someone furnishing a man cave vs making them dumpster food.